
This guide will help you on How to Change your Map to Extinction on your ARK Survival Ascended Server.
One of the best parts of hosting your own ARK: Survival Ascended server is the ability to choose which world you and your friends will explore. If you’re ready for a new challenge, Extinction is a thrilling official expansion map that drops survivors into a ruined Earth filled with corrupted creatures, massive Titans, and futuristic city ruins. Changing your server’s map to Extinction is a straightforward process, but it does require a few specific adjustments to your server settings. In this guide, we’ll walk you through the steps so you can make the switch smoothly and start experiencing everything Extinction has to offer. By the end, your server will be ready for epic battles, resource gathering in dangerous wastelands, and the ultimate fight for survival against the planet’s greatest threats.
Changing your Map to Extinction on your ARK Survival Ascended Server
Log in to your Game Control Panel and navigate to your service.
Before making any modifications, stop the server from running by clicking the Stop button.

There are three methods for changing your map to Extinction.
Method 1. Installing via Mod Manager
Navigate to the Mod Manager Tab, look for the Extinction Map, and click the Install button on the side.

There are two ways to change the map via the command-line manager.
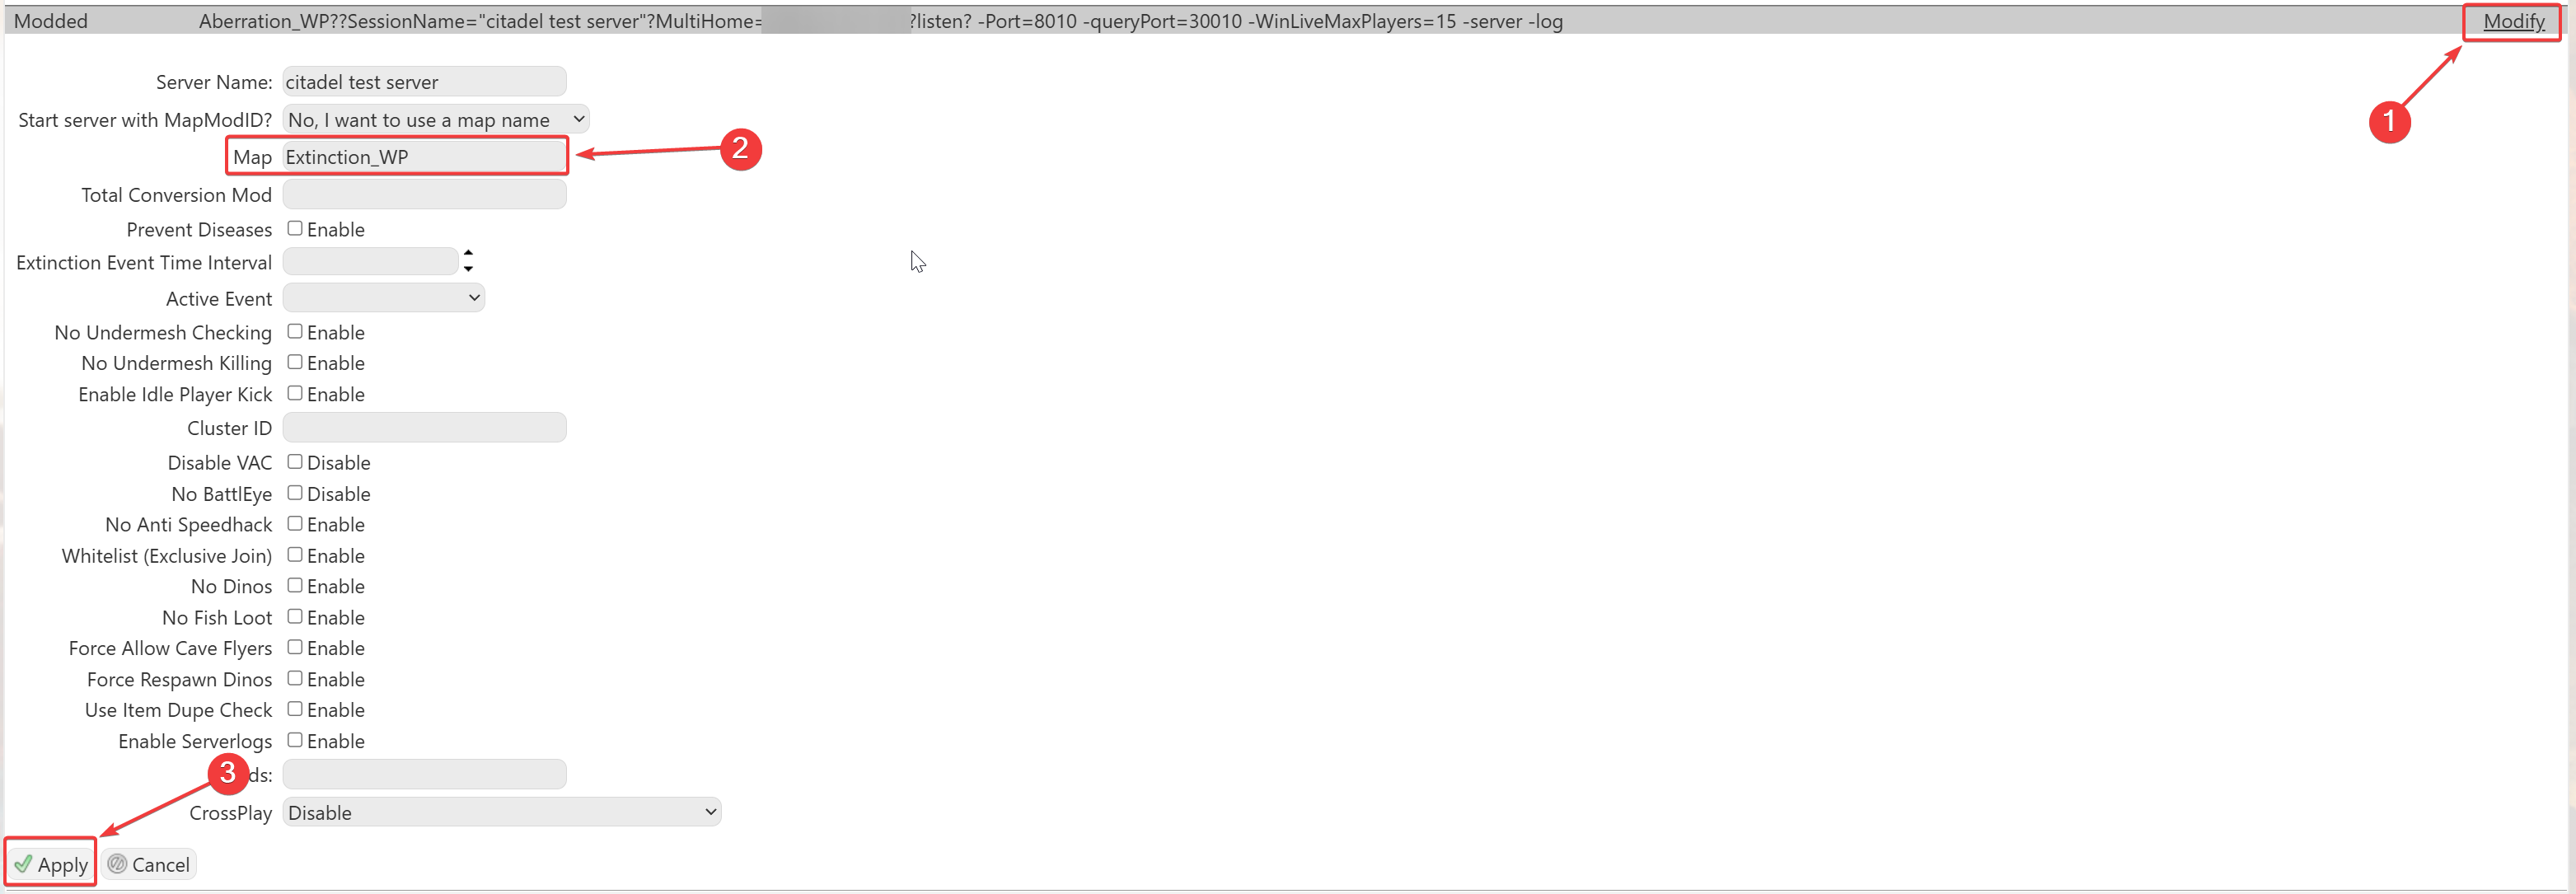
Navigate to the Commandline Manager Tab. Click Modify on the Default Commandline option. This will display the available options, including the Map section.
Select the "Extinction DLC MAP" for the Aberration map.

Method 3: Using a Modded Commandline
Please make sure to follow proper capitalization as they are case-sensitive.
